

Many first-time founders treat an independent store as a technical task: choose a theme, upload products, and the website is done. In practice, Shopify's technical and coding demands are low. What usually slows a launch is a set of unresolved business questions: who you are selling to, where you will ship, how shipping is priced, who pays for returns, and whether your payment account can be approved.
Shopify lowers the technical barrier dramatically. You do not need to write code or configure servers and SSL certificates. What it does not decide for you is the commercial layer. If you are still unsure whether Shopify is the right platform, or what Shopify is, start with our independent store platform guide.
1. Before You Start: What to Prepare
1. Define Your Products and Target Market
Before opening the Shopify registration page, write down clear answers to these four questions.
What will you sell? Do not stop at a broad category such as "home goods." Define the SKU level: which three to five products will lead, the approximate average order value, and whether accessories or consumables can create repeat purchases. Product volume directly affects the theme and navigation structure you need. A five-SKU store and a 500-SKU store need entirely different structures.
Which countries and customers will you target? The market determines almost every later setting: currency, language, payments, shipping templates, tax rules, and even privacy-policy wording. For a first version, lock in one or two core markets, get the flow working, then expand. Launching in ten countries at once usually creates a shipping and tax mess.
Which languages and currencies will you use? For the United States, use English and USD. For Europe, consider whether you need multilingual content and local-currency display. Shopify Markets supports multi-market setup, but every additional language means corresponding versions of page copy, product descriptions, and policy pages. The workload multiplies quickly.
How will shipping and returns work? Will you ship yourself or use an overseas warehouse? What is the average delivery time? Is the return address in China or in the target market? Who pays return shipping? These answers must be clear during setup because they belong in your Shipping Policy and Return Policy, two pages that affect both conversion and payment-account review.
2. Prepare the Brand Basics
Gather these materials in one folder before building the store.
- Store name: Make sure it has no obvious negative association in the target market, then check whether the matching domain and major social handles are available.
- Logo: Prepare at least a horizontal version for the header and a square version for the favicon and social profile images. Use transparent PNG or SVG.
- Brand colors and fonts: Define primary, secondary, and button colors. The Add to Cart color especially needs adequate contrast against the background. Keep fonts to two or fewer.
- Product images and videos: These are the single most important conversion asset. Each SKU should have a main image, detail images, and lifestyle images. Keep dimensions and visual style consistent.
- Brand story and contact details: Prepare a 150-300 word brand introduction, a real support email, and ideally a physical address and phone number.
- A dedicated domain: Prefer .com. Keep it short, easy to spell, and consistent with the brand name.
3. Estimate the Real Setup Cost
Do not look only at the subscription fee. A realistic launch budget includes:
| Item | Notes |
|---|---|
| Shopify subscription | Basic: $39 monthly or about $29 per month annually; Grow: $105 monthly or about $79 annually; Advanced: $399 monthly or about $299 annually. Annual billing is roughly 25% lower. There is also a $5 Starter plan, but it does not include a complete storefront. |
| Domain | Roughly $10-20 per year, depending on the TLD and registrar. |
| Theme | Free themes cost $0. Paid themes are commonly $180-400 as a one-time purchase. |
| Apps | The most variable cost. Reviews, email, multilingual support, and filtering apps together can range from $0 to $200 per month. |
| Payment fees | With Shopify Payments, U.S. online-card rates are about 2.9% + 30c on Basic, 2.7% + 30c on Grow, and 2.5% + 30c on Advanced. A third-party gateway also adds Shopify transaction fees of 2%, 1%, or 0.6% respectively. |
| Fulfilment | Inbound freight, last-mile shipping, packaging, and return losses. |
| Products, ads, and content | Initial inventory, samples, photography, and ad-test budget. |
Prices vary by time and region. Check Shopify's pricing page for your registration region before signing up.
A practical rule: the subscription is only a small part of the real cost. Once payment fees, app subscriptions, and advertising are included, a store's monthly spend is often several times the plan price. Treat the subscription as the entry ticket, not the main expense.
2. Register Your Shopify Account and Complete the Basics
1. Create the Store
Register the account. Use a dedicated company email rather than a personal address. It will be tied to your payment account, domain, and all notifications, so changing it later is painful.
Set the store name. The name entered at registration creates a default xxx.myshopify.com address. That address cannot be changed later, but customers will see your custom domain, so do not overthink it. Keep it aligned with the brand.
Set the store address and time zone. The address affects default tax and shipping calculations. The time zone affects order timestamps and reporting. Use the real operating-entity address.
Set the default currency. Configure it under Settings -> Store details. It determines your settlement currency and reporting baseline. If the United States is your primary market, choose USD. Shopify Markets can later display local currencies for other markets.
Set store email. Distinguish between the sender email customers see on order emails and the account email that receives Shopify notices. Use a domain email such as [email protected] for the sender, not Gmail. This improves trust and deliverability.
2. Connect a Custom Domain
Buy a new domain. You can buy it in Shopify under Settings -> Domains -> Buy new domain. The advantage is automatic configuration with almost no setup effort. The trade-off is less flexibility if you later migrate or want registrar-level control.
Connect an existing domain. For domains registered at GoDaddy, Namecheap, Alibaba Cloud, or elsewhere, choose Connect existing domain in Shopify, then update DNS records at the registrar:
- A record: point the root domain to Shopify's specified IP address.
- CNAME record: point
wwwtoshops.myshopify.com.
DNS can take minutes to 48 hours to propagate.
Set the primary domain. This is often missed. Choose one primary domain in Domains settings; every other domain, including the myshopify address, should 301 redirect to it. This is essential for consolidating SEO authority. If example.com and www.example.com both return 200, search engines can treat them as separate sites and split authority.
Check SSL. Shopify issues certificates automatically, usually within hours after a domain is connected. Confirm the domain status is active, then open the site in a browser and verify the lock icon and https protocol.
3. Choose a Theme and Design the Storefront
1. How to Choose a Shopify Theme
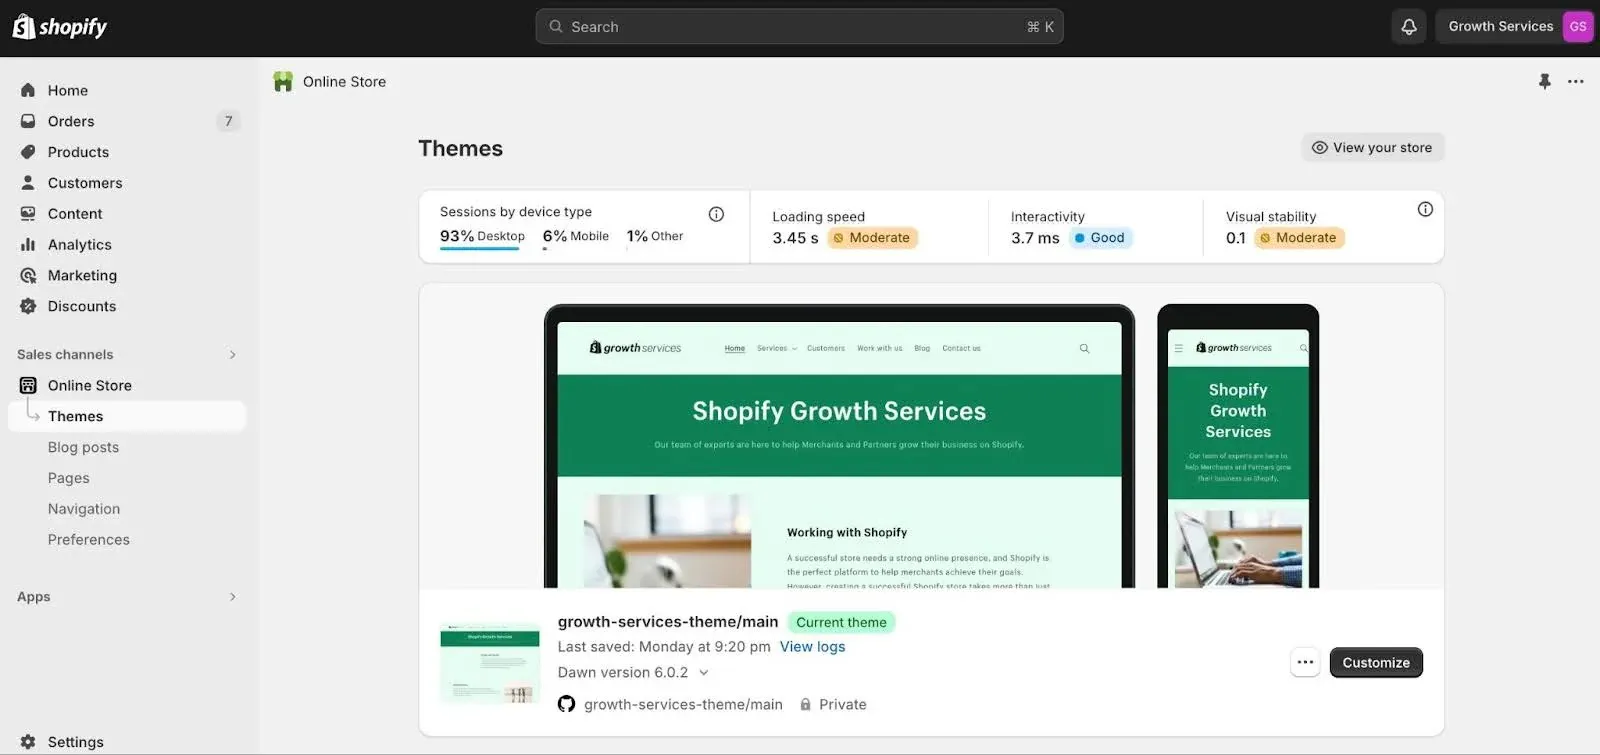
Free versus paid themes. Shopify's official free themes, such as Dawn and its variants, usually have the strongest code quality, loading speed, and compatibility with new Shopify features because Shopify maintains them. Paid themes mainly offer more prebuilt sections, richer visual presets, and some industry-specific features such as size charts, lookbooks, or product comparison.
If you are unsure, launch with a free theme. Themes can be changed later. Spending three weeks choosing a theme has a higher opportunity cost than a $300 theme purchase.
Choose based on product volume and category.
- Fewer than 20 SKUs and higher prices: choose a theme with large imagery, long-form pages, and space for brand storytelling.
- More than 100 SKUs: prioritize filtering, category navigation, and quick add-to-cart.
- Apparel: you need strong variant presentation, including color changes that switch images, plus size charts.
- Food and consumables: you may need subscription or bundle-purchase support.
Prioritize mobile experience. Mobile often accounts for more than 70% of independent-store traffic, and can be even higher for social-led stores. Do not assess a theme only through desktop screenshots. Open its demo on a real phone.
Evaluate navigation and the buying path, not just visuals. How many clicks does it take to get from the homepage to adding an item to cart? Are category entries clear? Is the Add to Cart button visible above the fold on product pages? Many visually impressive themes make the purchase path unnecessarily indirect.
2. Set the Store Visual System
- Logo and favicon: A header logo is typically 250-450px wide. The favicon should be a 32x32px square.
- Colors and fonts: Set these globally in Theme settings rather than editing them section by section, otherwise later changes become difficult to manage. Buttons must stand out clearly from the background.
- Homepage banner: The first screen must answer three questions: what you sell, why it is worth buying, and where the visitor should click next. Do not use a beautiful but uninformative image alone.
- Product showcase: Feature four to eight priority products on the homepage. Do not place every SKU there.
- Recommendations and reviews: Do not fill a new store with fake reviews. Use product benefits, materials, and use cases until genuine customer feedback is available.
- Header, footer, and menus: Put core categories and the cart in the header. Put policy pages, contact details, social links, and email signup in the footer.
3. Check the Mobile Experience
On a real device, not only browser emulation, confirm:
- The homepage browses and scrolls normally.
- Product images are sharp and do not load too slowly.
- Buttons are easy to tap, with a minimum 44x44px target.
- Text does not overflow, wrap incorrectly, or sit behind images.
- Pop-ups, including email signup and cookie notices, do not block key content and can be closed normally.
4. Add Products
1. Complete Core Product Information
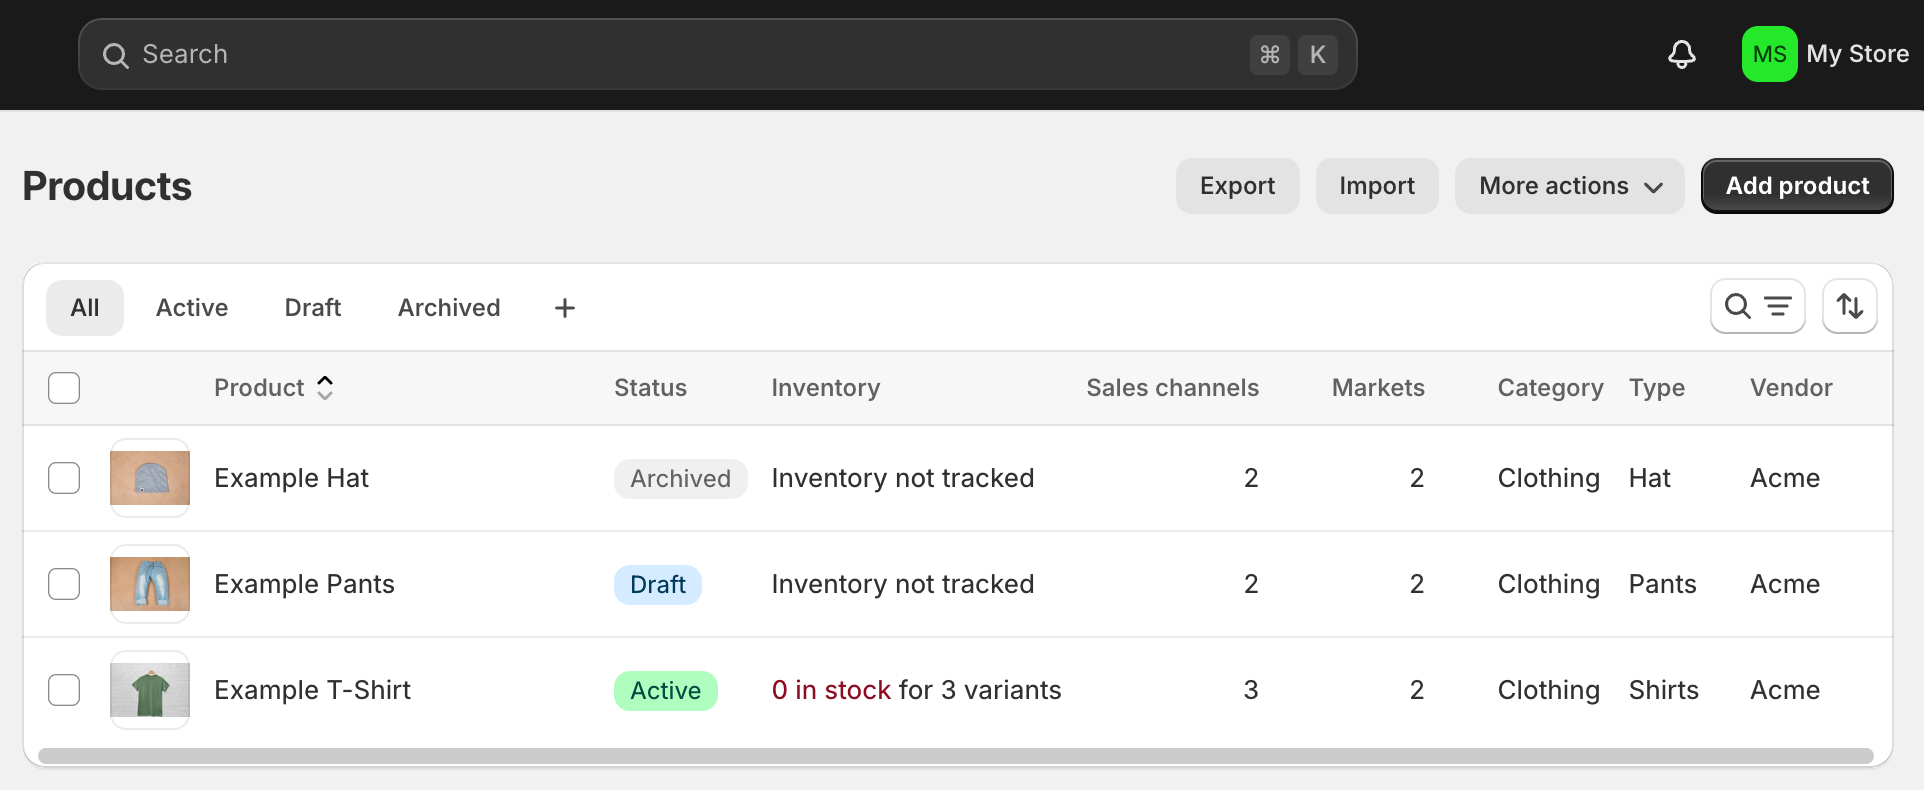
Product name. A useful structure is brand + core attribute + product type. It should be immediately clear to customers while including terms they might search for. Avoid keyword stuffing and vague internal product codes.
Product description. This is one of the weakest areas in many stores. An effective structure is:
- Open with two sentences explaining the problem the product solves.
- Use bullets for specifications, materials, dimensions, and compatibility.
- Close with use cases plus care or operating instructions.
Do not copy supplier descriptions directly. When the same copy exists across dozens of stores, it has little SEO value and creates no brand differentiation.
Product price. In addition to the selling price, use Compare at price to show a strike-through discount. Fill in Cost per item too, otherwise Shopify cannot calculate gross margin in reports.
Inventory quantity. Decide whether to enable Track quantity and Continue selling when out of stock. Preorder or dropshipping models may need overselling enabled, but the product page must clearly state the delivery time.
SKUs and barcodes. SKUs are your internal identifiers, so establish a convention from the start, for example category-model-color-size. GTIN, UPC, or EAN barcodes are required for Google Shopping.
Product weight. This directly affects shipping calculations. If you use weight-based rules or live carrier rates, an incorrect weight can create real losses. Use the packed shipping weight.
Options and variants. Keep variant dimensions to three or fewer, Shopify's option limit. Every additional option multiplies SKU count. For color and size, each combination needs inventory and an appropriate image.
2. Upload Product Images and Videos
Images are the primary conversion driver for independent stores. A complete image set should include:
- Main image: a white or solid background, centered product, and consistent framing across products.
- Detail images: close-ups of materials, construction, ports, and texture.
- Size images: annotated dimensions or a comparison with a familiar object such as a hand or table.
- Lifestyle images: the product in real use. These are often overlooked but highly effective for conversion.
- Video or 3D assets: demonstrations and unboxing videos. Shopify product pages support video and 3D models natively.
Use consistent dimensions, ideally 2048x2048px squares. Keep each file below 200KB where practical, and use descriptive English file names such as black-ceramic-mug-front.jpg instead of IMG_2847.jpg.
3. Organize the Product Catalog
Create product categories. Build the structure around how customers look for products, not how your internal team manages them. Do they browse by use, audience, or model?
Create collections. Shopify supports two kinds:
- Manual: suitable for collections such as New Arrivals and Editor's Picks that need human control.
- Automated: suitable for groups such as Under $50 or all products from one brand, using conditions such as tags, price, and stock.
Set tags. Tags power automated collections and filters. Define a tagging system in advance and keep capitalization consistent, otherwise Red and red become separate tags.
Configure color, size, and other variants. Make sure product images change with the selected variant by assigning images to each relevant variant.
Build clear filtering. Once you have more than 50 SKUs, enable filtering with Shopify Search & Discovery, the official free app. Limit filters to five or fewer dimensions, and ensure every option has real inventory behind it.
5. Create Required Pages and Navigation
1. Essential Pages
| Page | Purpose and key points |
|---|---|
| Homepage | Explain who you are, what you sell, and why visitors should trust you, then provide a clear next step. |
| Product page | Images, price, variants, Add to Cart, a shipping and returns summary, and common questions. |
| About Us | Brand story, team, or factory information. For a new brand, this is one of the most important trust-building pages. Avoid an empty slogan. |
| Contact Us | Email, a form, and a response-time promise. A physical address and phone number materially improve trust. |
| FAQ | Centralize answers about delivery times, returns, payments, sizes, and other frequent questions to reduce support load and abandonment. |
| Shipping Policy | Dispatch timing, delivery coverage, shipping rates, tracking, and duty information. |
| Return Policy | Return window, conditions, process, who pays shipping, and refund timing. |
| Privacy Policy | How data is collected and used. EU sales require GDPR compliance and California sales require CCPA considerations. |
| Terms of Service | Transaction terms, liability limitations, and dispute resolution. |
The last four policy pages are not merely formalities. Payment providers review them when assessing an account, and ad platforms review them when approving campaigns. Missing or superficial policies can lead to payment rejection or ad-account suspension. Shopify provides policy templates under Settings -> Policies; adapt them to your actual operation.
2. Set Website Navigation
- Top navigation: Keep five to seven primary entries. Beyond that, users start ignoring the menu.
- Category menu: For large SKU counts, use dropdown second-level menus, but keep the hierarchy to two levels or fewer.
- Footer navigation: Include all policy pages, contact details, social links, and email signup.
- Search: Once you have more than 30 SKUs, place a visible search entry in the header.
- Breadcrumbs or return paths: Help customers understand where they are and help search engines understand site structure.
6. Configure Payments, Shipping, and Taxes

1. Set Payment Methods
Shopify Payments or a third-party gateway. First verify whether the location of your operating entity is supported by Shopify Payments. Its direct benefit is no extra Shopify transaction fee. Third-party gateways, such as PayPal, standalone Stripe, or local methods, incur the gateway's own rate plus Shopify's 2%, 1%, or 0.6% fee depending on your plan.
Card payments. For Europe and North America, Visa, Mastercard, and Amex are foundational.
PayPal and other wallets. PayPal is widely used among older consumers in Western markets and increases trust, so it is worth keeping.
Apple Pay, Google Pay, and other express options. These one-tap methods can materially improve mobile conversion because customers skip manual address and card-number entry. They cost almost nothing to enable.
Check support in the target country early. This must be verified during setup, not discovered just before launch. Payment preferences vary widely: iDEAL in the Netherlands, Sofort or Klarna in Germany, Boleto in Brazil, and many wallets in Southeast Asia. If you cannot offer a market's preferred methods, conversion will suffer.
2. Set Shipping Rules
Configure these in Settings -> Shipping and delivery.
- Shipping zones: Group countries or regions and assign rates to each. Do not leave countries you cannot fulfil in a zone.
- Shipping rates: Common models are flat rate, weight-based, and order-value based. New stores should start with flat shipping or free shipping; simpler rules are easier to understand.
- Free-shipping threshold: A threshold around 1.3 to 1.5 times the average order value is a common way to lift basket size.
- Delivery time: State estimated days directly in the rate name, for example
Standard Shipping (7-12 business days), to reduce "Where is my package?" support requests. - Tracking: Confirm that your logistics setup provides trackable numbers in the destination market.
- Remote-area and special-product rules: Large, liquid, or battery products often need separate rates or excluded zones.
3. Set Taxes
- Whether to collect sales tax: This depends on your operating location, the target market, and whether you meet local registration thresholds, such as nexus or VAT thresholds.
- Country and regional rules: U.S. sales tax varies by state and sometimes county. The EU uses VAT and IOSS, while the UK has separate VAT rules. Shopify can calculate rates automatically, but automatic calculation is not tax compliance. You must still register and file where required.
- How taxes are displayed: EU buyers expect tax-inclusive prices, while U.S. buyers expect tax added at checkout. Match the local convention because it changes price perception and abandonment.
- Consult a local tax professional where needed. Rules are complex, regional, and frequently changing. This guide cannot replace advice for your specific situation. For cross-border VAT, duties, and import clearance, the cost of a mistake can far exceed a consultation fee.
7. Set Up the Checkout Flow
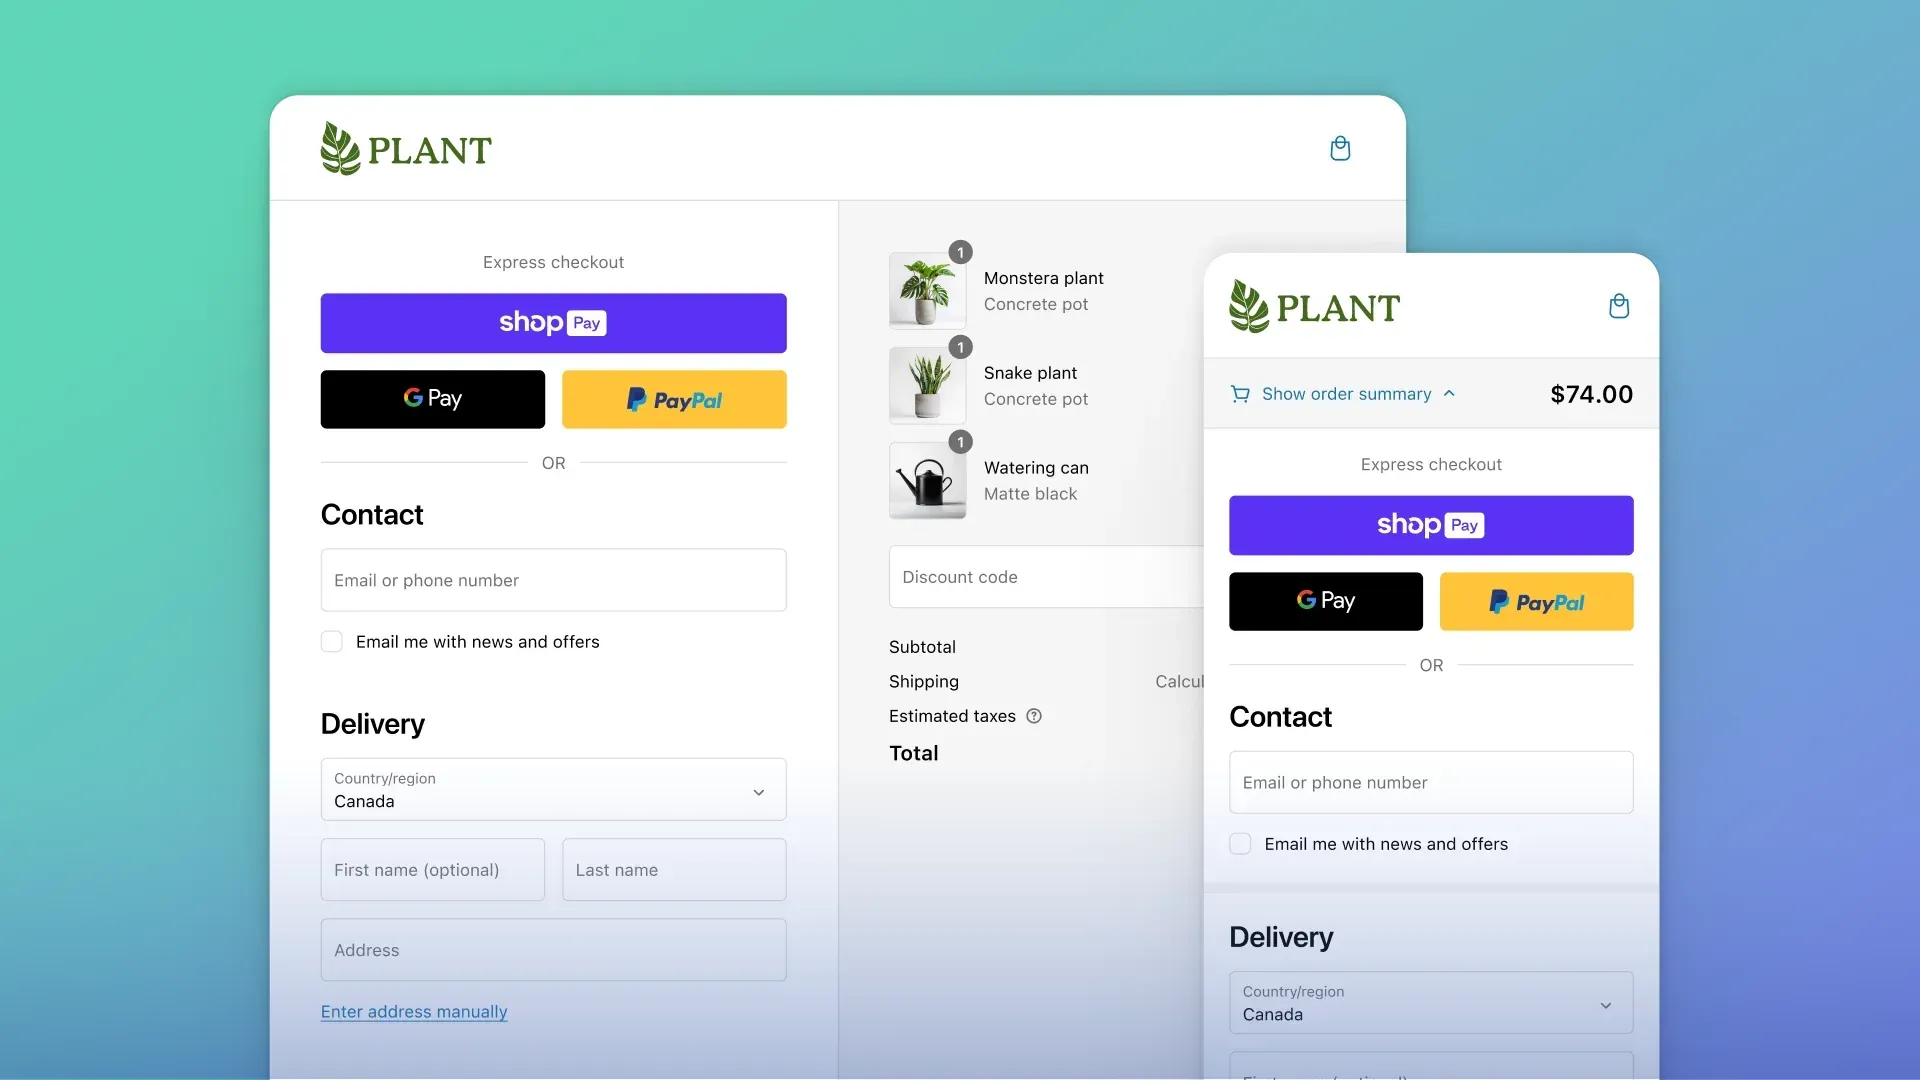
1. Configure Checkout
Configure these in Settings -> Checkout.
- Customer information: Decide whether phone number is required, optional, or not collected. Every extra required field raises abandonment slightly, but it must be required if your carrier needs it.
- Shipping and billing address: Confirm the address format suits the target market. U.S. forms need State; Japan uses a different postal-code format.
- Guest checkout or customer accounts: New stores should allow guest checkout, with accounts optional. Forced registration significantly raises abandonment.
- Discount codes and gift cards: Confirm that the discount field is visible at checkout. Do not make it overly prominent, though, because customers without a code may leave to search for one.
- Order confirmation email: Review the template in Settings -> Notifications, use your logo and brand voice, and confirm the sender is your domain email.
2. Set the Cart and Abandoned-Checkout Recovery
- Cart page: Confirm customers can change quantities, remove items, and see shipping estimates or progress toward free shipping.
- Cart notes: Let customers leave notes, such as gift-wrapping requests, but never make this required.
- Upsells: Recommending accessories or basket-building products in the cart is a low-cost way to raise AOV, but it must not crowd out the checkout button.
- Abandoned-checkout emails: Shopify provides recovery on Grow and above, or through an app. A common cadence is one hour, 24 hours, and 72 hours after abandonment, with a modest discount in the third email.
- Checkout-failure messages: Test an invalid card and make sure the resulting message is clear rather than a technical error string.
8. Complete Pre-Launch Testing
This is the easiest step to skip and one of the most expensive to skip.
1. Page Testing
Open the homepage, product pages, collection pages, contact page, and every policy page on both mobile and desktop. Check that content is complete, theme-demo copy has been removed, and every image loads.
2. Purchase-Flow Testing
Walk through a full purchase path:
- Add a product to cart.
- Select variants such as color and size, confirming that images and prices change correctly.
- Change cart quantity and confirm the subtotal.
- Apply a discount code and confirm the discount.
- Choose a shipping method and confirm the rate.
- Complete a test order.
- Confirm payment success, receipt of the order-confirmation email, and accuracy of the email details.
Shopify's Bogus Gateway can simulate transactions. If Shopify Payments is active, place and refund a small real-card order as well. That is closer to the real world and tests both settlement and refunds.
3. Technical Checks
- The domain resolves correctly, both with and without
www. - SSL works and the browser shows the security lock.
- All links work, especially policy links in the footer.
- All images load with no broken placeholders.
- A 404 page exists and gives visitors a route back to the homepage.
- The store is not still password protected, one of the most common launch mistakes.
9. Publish the Shopify Store
1. Final Checks Before Publishing
- Remove password protection under Online Store -> Preferences -> Password protection.
- Select a paid plan before the trial expires, otherwise the store will be paused.
- Confirm the primary domain is correct and other domains redirect properly.
- Confirm payment accounts are approved and can receive money.
- Confirm inventory and shipping rules match actual fulfilment capacity.
- Confirm support contacts are real and someone is responsible for responding.
2. What to Watch in the First Two Weeks
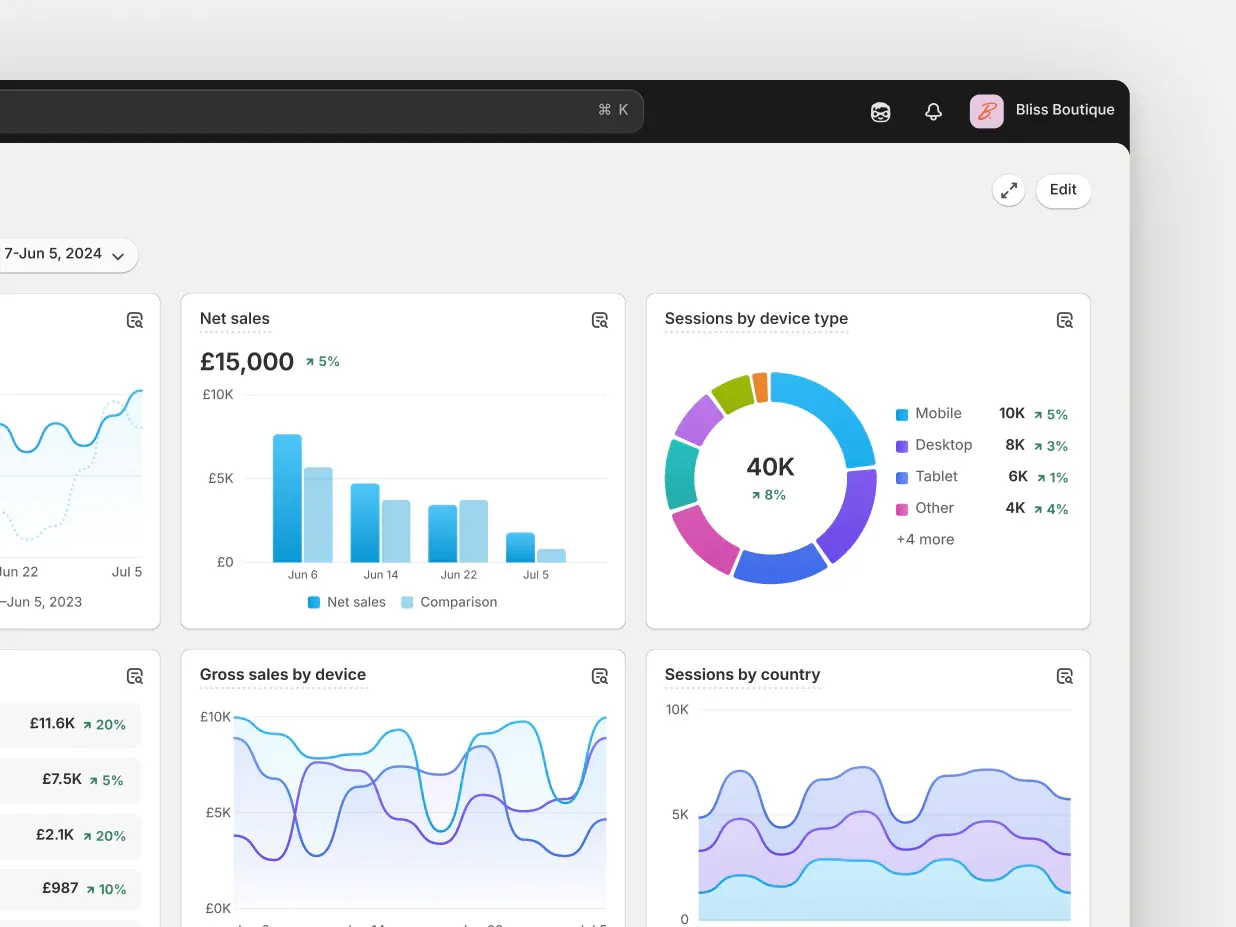
Use Shopify Analytics and Google Analytics to watch these indicators:
| Metric | What it tells you |
|---|---|
| Site traffic | Whether the store has traffic. Without traffic, other metrics are meaningless. |
| Product-page views | Whether visitors reach products. High homepage bounce can mean the homepage does not communicate value. |
| Add-to-cart volume | Product-page-to-cart conversion. Low performance often points to images, copy, or pricing. |
| Checkout starts | Cart-to-checkout conversion. Low performance usually means unexpected shipping, required registration, or weak trust. |
| Payment success rate | Checkout-to-payment conversion. Low performance often means payment-method mismatch or technical problems. |
| Customer feedback | Questions that repeat in support emails are information the website failed to explain. |
| Mobile anomalies | Review the mobile funnel separately. It is often lower than desktop, but a large gap signals a mobile-experience problem. |
The funnel matters because it shows where the problem happens. A low conversion rate is an outcome, not a diagnosis.
10. Build the First Promotion Foundation After Launch
At launch, a new store has almost no organic traffic. Do not attempt every channel at once. First find one channel that can bring real visitors and get the conversion path working.
1. Social Media Promotion

- Instagram: A strong fit for visual products such as apparel, home goods, and beauty; useful for discovery content and creator partnerships.
- Facebook: An older audience with mature ad tools; useful for targeted acquisition and community operations.
- TikTok: A short path from video to conversion; good for products with strong visual impact or clear demonstrations.
- Pinterest: Search-led with long content lifetimes; strong for home, DIY, and wedding categories.
- YouTube: Useful for high-ticket products requiring detailed explanation. Production costs more, but the content can have long-term value.
Go deep on one or two channels that fit the product rather than posting the same thing everywhere.
2. Basic SEO
Organic traffic takes time, but it has a favorable cost structure. Get the basics right at launch:
- Homepage title and description: Include the brand and core category in a title under 60 characters. Keep the description around 150-160 characters and write for people, not search engines.
- Product-page titles and descriptions: Write unique title tags and meta descriptions for every product rather than keeping Shopify's autogenerated version.
- Image alt text: Describe the image for both accessibility and image search.
- Collection structure: Keep URL hierarchy clear and avoid putting the same product on multiple paths that create duplicate content.
- Internal links: Link from blog posts to product pages and from products to related products so search engines understand page relationships.
- Search indexing: Verify the site in Google Search Console, submit Shopify's automatic
/sitemap.xml, and ensure Online Store -> Preferences is not blocking search engines from indexing.
3. Email Marketing
Email is one of the few channels you own rather than rent from a platform. The basic automations include:
- Welcome email: Send immediately after signup, often with a first-order offer.
- Abandoned-cart email: Usually one of the highest-return email types.
- Order confirmation and shipping notification: These have very high open rates and can include accessory recommendations or social follow prompts.
- Post-purchase follow-up: Send seven to 14 days after delivery to request a review or feedback.
- Reorder reminder: For consumable products, send based on the expected usage cycle.
11. Common Mistakes
Spending heavily on theme changes before deciding on the product and customer. Theme work is the easiest way to feel busy. Visuals can be changed at any time; if the product or positioning is wrong, a beautiful site does not matter.
Installing too many apps. Every app injects scripts into the page. After five or six stack up, load speed suffers noticeably. Each extra second on mobile can materially reduce conversion. Remove unused apps regularly, and check for leftover code after uninstalling them.
Uploading only product shots and no lifestyle images. A white-background image tells customers what the product is; a lifestyle image tells them why it suits them. Without the latter, it is harder to move from seeing to wanting.
Leaving shipping and return policies unclear. Before checkout, customers care most about when an item will arrive and whether they can return it. If those answers are unclear, abandonment is almost inevitable.
Testing only desktop, not mobile. Most traffic comes from phones while most setup work happens on desktop. That mismatch means issues are often discovered only after real customers see them.
Not placing a test order. A complete purchase test takes about ten minutes and can expose wrong shipping rates, email-template errors, and failed payments before customers do.
Not reviewing data after launch. Launch is not the finish line. Without funnel data, you can only guess where a problem lies.
Copying supplier images and descriptions directly. This is common in new stores and makes it difficult to differentiate content. When identical images and copy appear on dozens of sites, customers have no reason to choose yours.
Final Thoughts
Shopify has lowered the technical barrier to building an online store, which means building the store is no longer a competitive advantage by itself. When anyone can launch a functional storefront in a week, the real differentiators are product selection, content quality, traffic-acquisition efficiency, and fulfilment experience.
That is why the steps in this guide that may not look like website building - deciding who to sell to, writing a clear return policy, producing strong lifestyle photography, and completing a test order - often deliver the highest return. Technical configuration needs to be correct once; commercial judgment needs continual refinement.